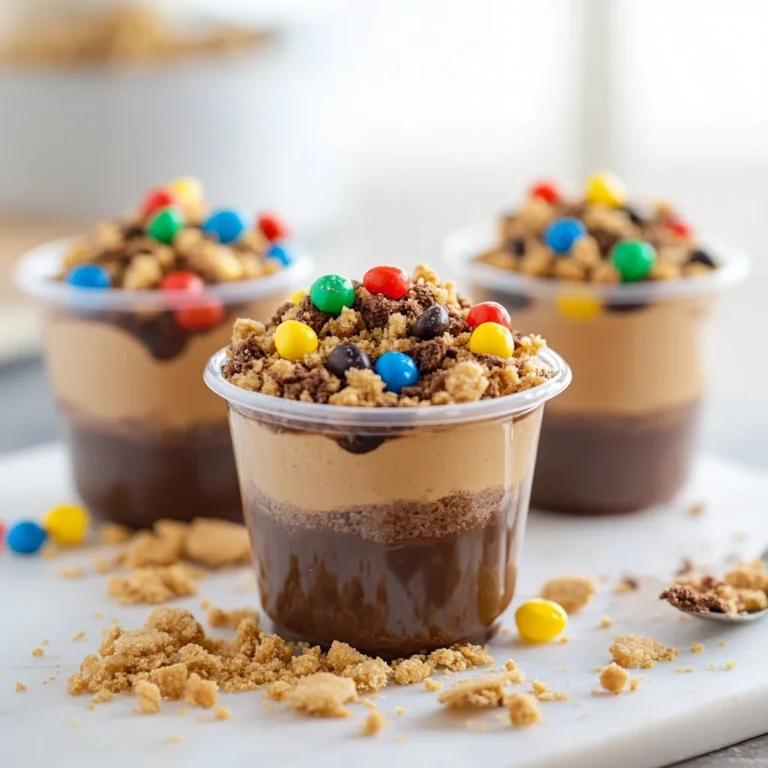
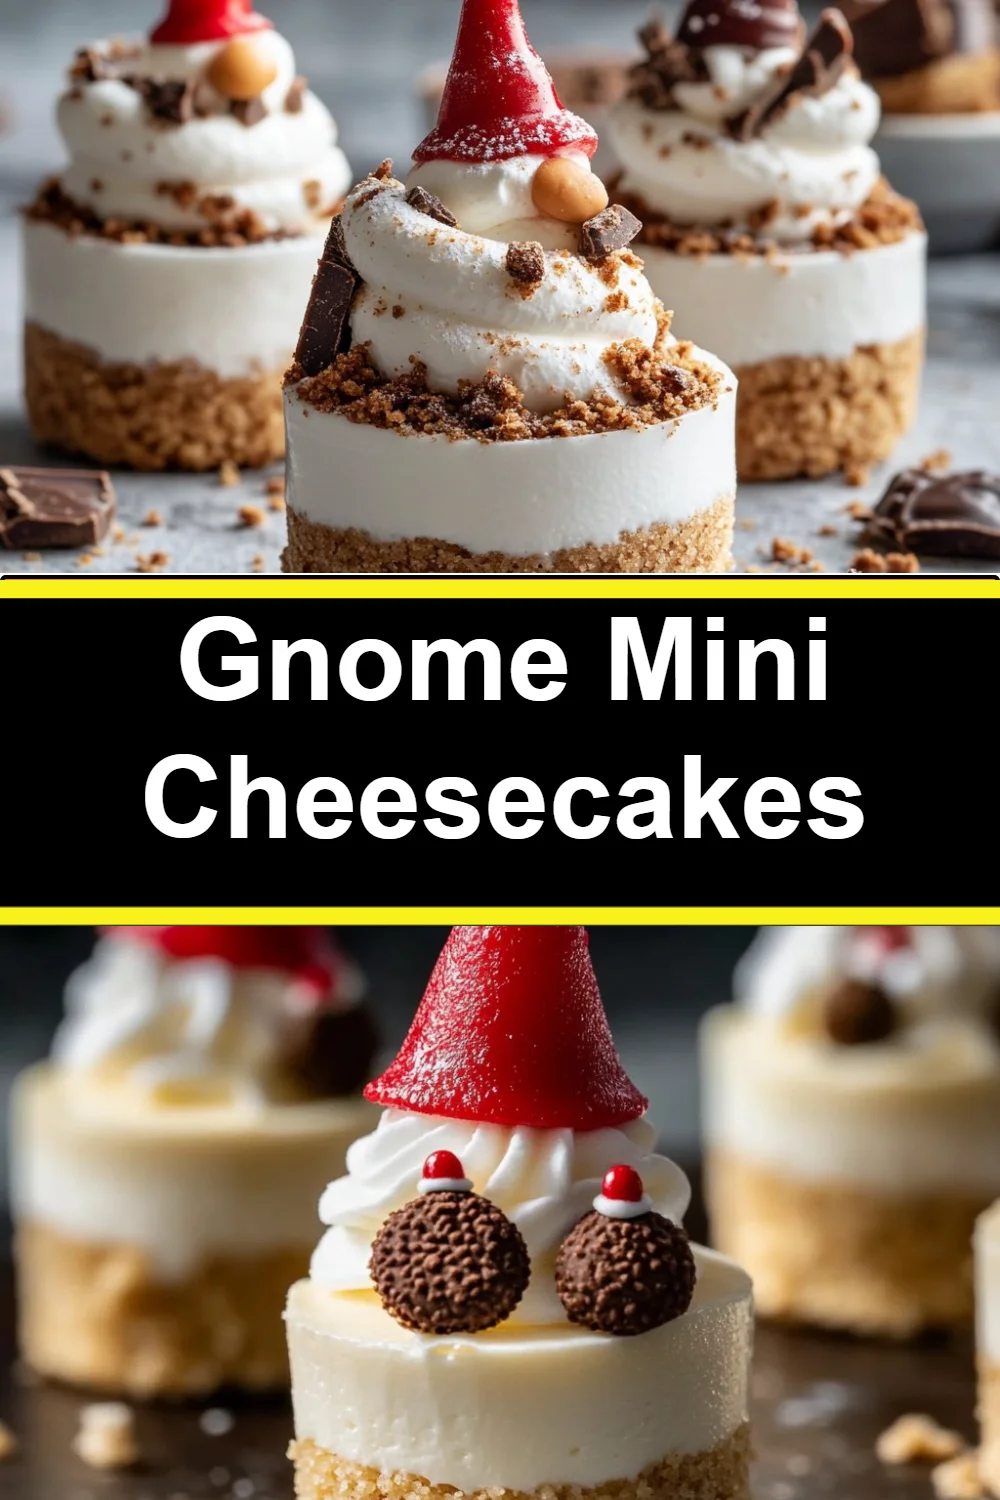
Gnome Mini Cheesecakes
The table is a little chaotic: my daughter tapping out a rhythm on her cup, my son folding napkins into crooked triangles, and the warm, sweet scent of cream cheese and graham crumbs drifting from the counter. That smell takes me back to rainy afternoons in my grandmother’s kitchen by the dam, where small treats were a reason for small celebrations. Today I’m sharing a recipe that brings that same hush of happiness to our home: Gnome Mini Cheesecakes. Give it a try — it’s easier than it looks, and it invites a little playful magic to dessert time.
Why This Gnome Mini Cheesecakes Feels Like Home
There is something about tiny desserts that make a big impression. These Gnome Mini Cheesecakes fold simple flavors into a bite-sized moment of comfort. The creamy filling, the crisp graham base, and a playful red hat touch on top make them feel handmade and special.
When life gets busy, this recipe gives you a small victory that tastes like a treat. I often reach for inspirations like mini pineapple upside-down cheesecakes when I want to offer something pretty and unfussy. These gnome cheesecakes take less time than a whole cake and they involve just a few simple steps, so weeknight dessert can be both cozy and doable.
Why Gnome Mini Cheesecakes is Our New Family Favorite
These are a favorite because they involve everyone. My kids love pressing the crumb crust into the cups and adding goofy chocolate faces. The final touch — a dot of red food coloring for a gnome hat — is an instant joy-bringer. They’re also forgiving: the filling is whipped and light, so a little unevenness disappears once chilled.
Make them for a quick party dessert or a quiet weekend treat. They travel well to potlucks, and everyone gets their own little portion, which always keeps feelings calm at the table.
The Simple Magic Behind Gnome Mini Cheesecakes
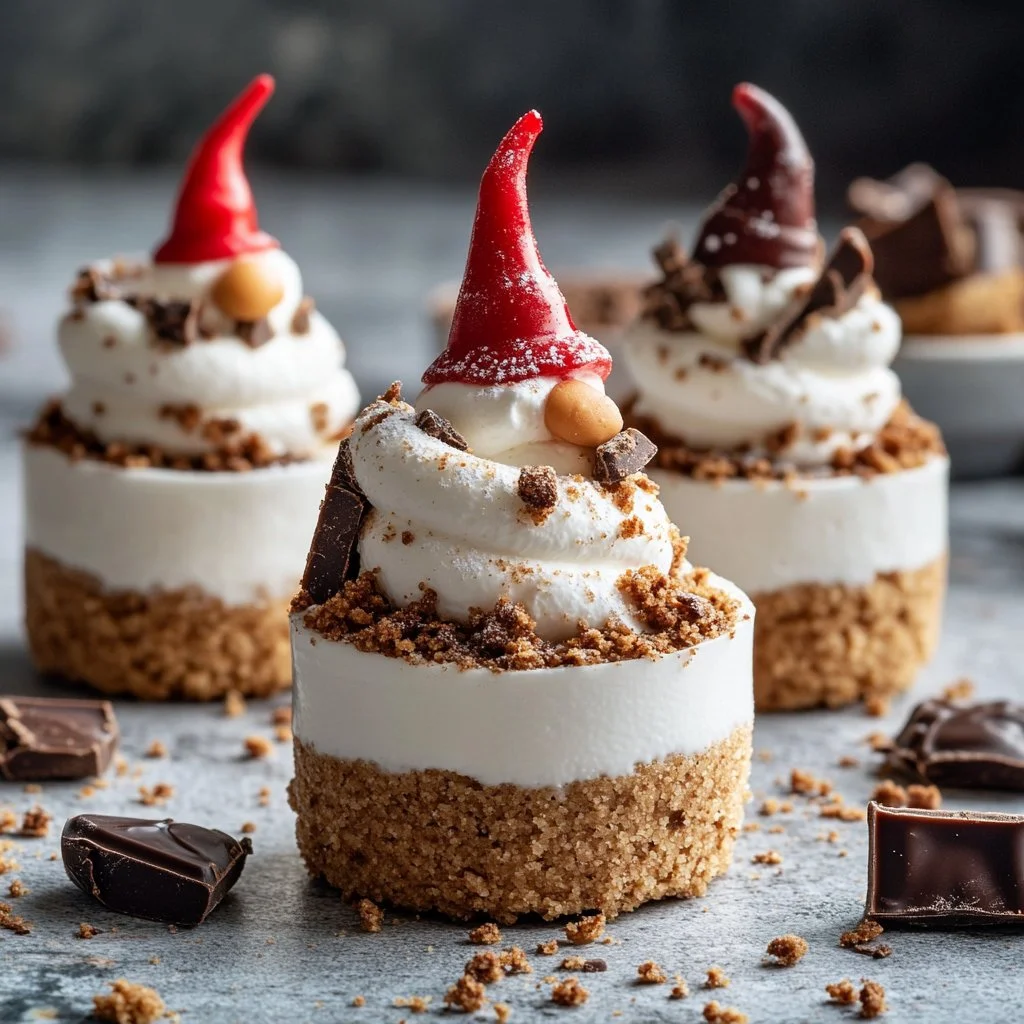
This dessert balances textures: silky cream cheese filling, crunchy graham base, and a chocolate cookie to anchor the gnome look. The visual cue of the red hat makes them festive without fuss. If you love small-bite desserts that look thoughtful, this one delivers.
The flavor logic is simple: cream cheese brings tang, powdered sugar softens that tang with sweetness, whipped cream adds airiness, and the graham crust adds toasty warmth. Use good vanilla and fully softened cream cheese for the best texture.
Why This Recipe Works for Our Busy, Joyful Nights
It is fast to assemble and needs only refrigeration to finish. That means you can make the crust and filling in under 20 minutes, then let the fridge finish the job. The chilling step is non-negotiable for texture, but once they are set you can keep them chilled for parties or prepare them ahead.
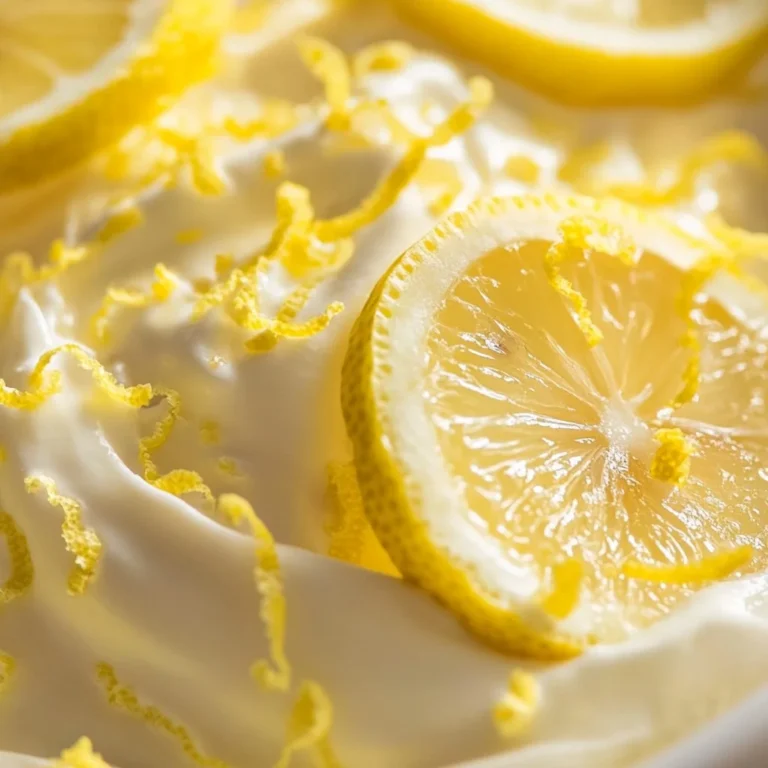
This recipe sits happily beside other simple sweets. If you like floral, citrus desserts, try pairing it with a light cake like mini lemon cakes with lavender glaze for a little variety at your table.
How to Make Gnome Mini Cheesecakes, The Heartwarming Way
“This is where the magic happens—when the aroma fills the kitchen and my kids come running in, asking ‘Is it ready yet?’”
The process is forgiving and joyful. Start with a smooth, creamy base and a slightly crunchy crust pressed into small dessert cups. The filling should be pale and soft. Once you fold the whipped cream in, you will notice the mixture turn airy and light; that is the cue that you are on the right track. When the cups chill, the tops become smooth and slightly glossy — another good sign.
Step-by-Step Overview: Keeping It Simple
-
In a mixing bowl, beat the softened cream cheese until smooth.
Use a paddle or whisk; scrape the bowl so no lumps remain.
This base sets the tone for silky texture. -
Gradually add powdered sugar and vanilla extract, mixing until well combined.
Taste as you go for sweetness.
Don’t overmix once sugar is added, just get it even. -
Fold in the whipped cream gently.
Use a spatula and lift to keep air in.
This gives your filling that clouds-and-silk texture. -
In another bowl, combine graham cracker crumbs and melted butter, then press the mixture into the bottom of small dessert cups.
Press firmly so the crust holds together.
I use the back of a spoon or a small measuring cup. -
Spoon the cream cheese mixture over the crusts and smooth the tops.
Fill cups almost to the rim but leave room for decoration.
Smooth tops make the final look tidy. -
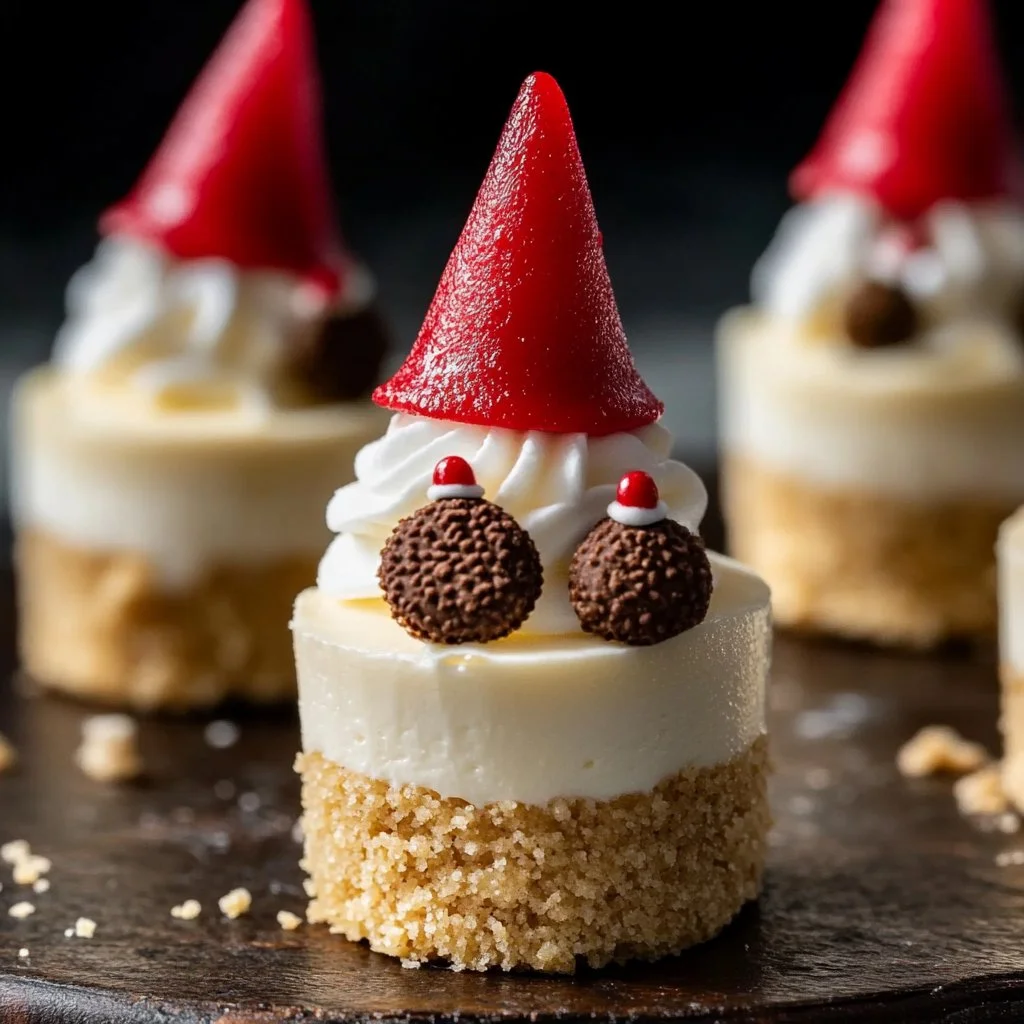
For a fun gnome touch, add drops of red food coloring to create a gnome hat design on top of the cheesecakes.
A toothpick helps pull and shape the hat.
Don’t worry about perfection; charm is in the imperfection. -
Decorate with chocolate wafers or cookies to represent the gnome base.
Place them gently so they don’t sink.
A single wafer makes a cute gnome beard or base. -
Chill in the refrigerator for at least 2 hours before serving.
The chill firms the filling and melds flavors.
Overnight is fine and often better for parties. -
If using, place miniature gnome figures on top for decoration.
For serving, remove the figure before eating if it is not edible.
Kids love the surprise of a tiny gnome.
Quick tip from my kitchen: let the cream cheese sit out for 30 minutes if you forget to soften it earlier. It mixes decades smoother than cold blocks. Also, let children handle the decorating step — it’s safe and very fun.
Ingredients You’ll Need
- 8 oz cream cheese, softened
- 1/2 cup powdered sugar
- 1 teaspoon vanilla extract
- 1 cup whipped cream
- 1/2 cup graham cracker crumbs
- 2 tablespoons unsalted butter, melted
- Red food coloring
- Chocolate wafers or cookies for decoration
- Miniature gnome figures (optional)
Friendly note: don’t stress if you don’t have exact grocery-store brands. Good vanilla makes a noticeable difference, but a home pantry swap works fine. If you want a lighter version, try a low-fat cream cheese and an extra tablespoon of whipped cream. If you like a citrus touch, add a teaspoon of lemon zest to the filling. This is about happy cooking, not perfection.
Preparing Gnome Mini Cheesecakes Without the Stress
Start by setting up a small assembly line: one bowl for crumbs, one for cream cheese, a chilled tray for the cups, and your decorations ready. That keeps the kitchen calm. Meanwhile, invite kids to help press crusts or pipe filling with a zip-top bag cut at one corner. These little tasks make them feel proud and free you up for the smoother steps.
If you’re making a bunch for a gathering, assemble the crusts a day ahead and keep them covered. Then make the filling the next day and finish. It halves the workload and keeps your evening uncluttered.
Serving Gnome Mini Cheesecakes with Love
I serve these in the middle of the table on a tray so everyone can pick their favorite. Some people like the wafer at a jaunty angle; others prefer the gnome figure tucked beside the cup. We add a small bowl of fresh berries and a drizzle of warmed chocolate for those who want extras.
Pairing them: a pot of tea or a small pour of coffee suits the slightly sweet tang. If you want a real celebration plate, add a spoonful of berry compote on the side. For quieter nights, they are delightful on their own after a family dinner.
I love how these bring people together. Once, we served them after a rainy soccer game. Everyone was cold and hungry, and the little cheesecakes made faces light up faster than I expected. Those are the recipes I keep reaching for.
Storage & Reheat Tips (Keeping the Goodness)
Gnome Mini Cheesecakes keep well in the refrigerator for up to 4 days in an airtight container. If they sit out more than two hours at a party, move them back to the fridge. For travel, place them in a shallow box with a piece of parchment between layers to protect the decorations.
These do not need reheating. If you want a warm twist, serve with a warmed berry sauce on the side. The microwave will work for a quick warm sauce, but warm gently so the cheesecakes themselves stay cool and firm.
If you must freeze, freeze the plain cheesecake cups without delicate decorations for up to one month. Thaw overnight in the refrigerator and add fresh decorations just before serving.
My Kitchen Notes & Shortcuts
- Prep ahead: Make the crusts the night before and keep covered.
- Kid-friendly step: Let younger helpers press crumbs and place chocolate wafers.
- Quick piping: Use a zip-top bag with the corner snipped for neat filling.
- Flavor swap: Add lemon zest or a teaspoon of espresso to the filling for a small twist.
- Time saver: Use store-bought whipped cream in a pinch; homemade is lovely when you have a little time.
These little tricks save time without losing that homemade feel. I learned to keep a small bin of chocolate wafers and decorations just for desserts like this. It turns a simple recipe into something festive in minutes.
Family-Friendly Variations
Play with the idea of gnome faces and hats. You can make them holiday-themed with green food coloring for winter elves or pastel hats for spring celebrations. For a lighter option, fold in Greek yogurt with the whipped cream to add tang and cut richness. For a decadent version, swirl in a tablespoon of melted white chocolate.
If your family loves a citrus note, add a teaspoon of orange zest to the filling. For a nutty crunch, sprinkle finely chopped toasted almonds on top of the crust before spooning in the filling. These small changes make the recipe feel fresh and personal.
If you enjoy mixing desserts, this is a great companion to other mini treats. For a bright contrast, a few of my friends like to serve them alongside citrusy cakes like mini lemon cakes with lavender glaze at brunch. Another family favorite is to offer a selection of tiny desserts, including inspirations from mini pineapple upside-down cheesecakes, so every guest finds a favorite.
FAQs About Gnome Mini Cheesecakes
Q: Can I make this ahead for a busy week?
A: Absolutely. These are great made the night before. The flavors settle and the texture improves after a good chill. Just keep them covered.
Q: What if I don’t have cream cheese softened?
A: Let it sit at room temperature for 20 to 30 minutes. If you are short on time, use the microwave in 5-second bursts until spreadable but not melted.
Q: Can kids help with this recipe?
A: Yes. Kids can press the crust, spoon the filling, and add decorations. It is a safe, low-risk dessert that invites participation.
Q: Do I need to use red food coloring?
A: No. Use any color that fits your mood or the season. I’ve used pink for birthdays and green for spring with equally sweet results.
Q: Are the miniature gnome figures edible?
A: If the figures are plastic or ceramic, remove them before eating. Edible decorations like marzipan or fondant gnomes make a fully edible option.
One Final Thought from My Kitchen
I hope these Gnome Mini Cheesecakes find a cozy place at your table and create a few new stories. They are tiny, forgiving, and full of charm, perfect for bringing a bit of whimsy to ordinary nights. If your kids decorate one with a wildly crooked hat and then grin with pride, you have succeeded.
Conclusion
If you want a few creative ideas for tiny, playful desserts to sit alongside your cheesecakes, you might enjoy the bright twist on small cheesecake treats found in Grinch Mini Cheesecakes – Baking You Happier, which gives a fun seasonal spin. For a different gnome-adjacent idea with a brownie base, check out Easy Brownie Bite Gnomes – It’s Always Autumn for inspiration on playful decoration and assembly.
Until next time, happy baking and may your kitchen be full of small celebrations and warm moments.

Gnome Mini Cheesecakes
Ingredients
Method
- In a mixing bowl, beat the softened cream cheese until smooth.
- Gradually add powdered sugar and vanilla extract, mixing until well combined.
- Fold in the whipped cream gently until the mixture is airy and light.
- In another bowl, combine graham cracker crumbs and melted butter, then press into the bottom of small dessert cups.
- Spoon the cream cheese mixture over the crusts and smooth the tops, leaving room for decoration.
- Add drops of red food coloring to create a gnome hat on top.
- Decorate with chocolate wafers or cookies for the gnome base.
- Chill in the refrigerator for at least 2 hours before serving to firm up the filling.
- For a better flavor, refrigerate overnight.